Google Webmaster Tools – A Guide For eCommerce Sites Part 1
In this first of three blog posts on Google Webmaster Tools for eCommerce sites, I will cover the top features within the tool that website owners need to understand in order to improve their sites performance in Google.
For any eCommerce website owner reading this who doesn’t know what Google Webmaster Tools (GWT) is, here is a quick overview:
GWT is a powerful free service provided by Google to help website owners understand how their site is indexed on Google and to improve visibility of their site in Google search.
If you want to improve the performance of your eCommerce site on the world’s biggest search engine and increase traffic to your site then understanding how the different features work in GWT will help you to do this. It is vital that every eCommerce website has GWT setup and those running the site understand how it works.
However, it must be noted that there are many advanced features with GWT that if misconfigured can be detrimental to the performance of your eCommerce site in Google, with this in mind, It’s important that you fully understand the impact of any changes before making them.
The Setup
Priority: High
The first thing you will need to do if you haven’t already done so, is setup a GWT account and verify ownership of your eCommerce site. Without verifying your site, you will not be able to access any of the data that Google has on your site and will you not benefit from its features.
To gain access to GWT, the first thing that you will need to do in order to set up a Google Webmaster Tools account is to register for a Google account. To do this visit:
https://accounts.google.com/SignUp
Once you have registered, please visit the URL below.
If you already have a Google Account, then please visit: http://www.google.com/webmasters/tools/
If you have a Google Analytics account, then I recommend using the same email address to register with GWT.
When you visit the URL above, the following screen will appear:
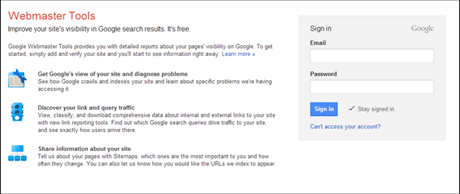
Simply enter in the email address and password for your Google account. Once you have logged in you will see the ‘Welcome to Webmaster Tools’ message:
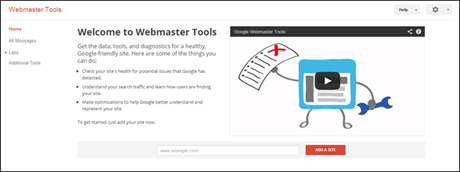
To add a site to Webmaster Tools, enter in the URL for your site in the box shown below:

It is important that when adding in your website address that you add in the correct one. Your website address will be in one of two formats, for example: www.example.com or example.com
If your website includes a www at the beginning, it is important that you have the www. at the beginning. Conversely if your website address does not include a www. then you should not include a www. at the beginning of your website address.
Once you have entered in the URL for your site, click the add site button.

The following screen will appear:
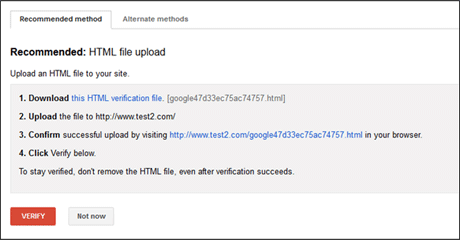
The simplest way to verify your site is to upload a HTML file to your webserver via FTP.
Download the file and then upload the file into the root directory onto your server using FTP. Once you have done this, click on the verify button at the bottom of the screen.
If you do not have FTP access to your site or are unsure of how to upload the file, then please send the file to your web developer, who will be able to upload the file for you.
Please note according to Google: “Removing the file from your server can cause your site to become unverified, and you will need to go through the verification process again.”
Once you have verified your site, it can take between several hours to several days to populate the data in the dashboard and the reports.
Adding An XML Sitemap
Priority: High
Once you have verified that you are the site owner, the next step is to add an XML sitemap into Webmaster Tools.
An XML sitemap is the best way of letting Google know about all of the pages on your eCommerce site. This is particularly useful for getting new product pages indexed quickly, which means that the pages will start appearing in search results faster. It is vital that when new pages are added to the site, that these are dynamically added to the XML sitemap, to ensure that they are indexed as quickly as possible.
To check whether or not your site has an XML sitemap is relatively simple, as they are usually in the same location on each site: http://www.yourdomain.com/sitemap.xml
If you cannot find a sitemap at the location shown above you can check with your web developer as to location of the XML Sitemap and whether your site has one.
If your site does not have an XML Sitemap, here is further information on creating one: https://support.google.com/webmasters/answer/183668?hl=en&ref_topic=8476
How To Add An XML Sitemap
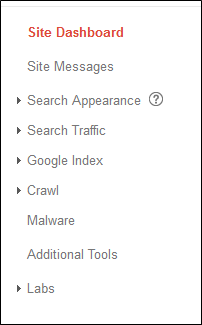
When you are on the site dashboard page, click on crawl: Then sSitemaps:
The following screen will appear:
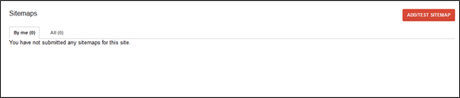
Click on Add/Test Sitemap 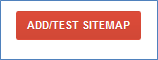 The following will appear:
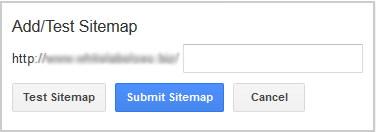
Enter in the location of your XML sitemap in the box provided and click the Submit button.
![]()
Once you have successfully submitted your sitemap, the following will appear:

Click on refresh the page.

The following will appear at the bottom of the screen:
This shows that the XML Sitemap has been submitted and is waiting to be processed by Google.
Once an XML sitemap has been submitted to Google, it can take up for 48 hours for it to be processed by Google. Once the sitemap has been processed, then you will be able to see the number of pages submitted and the number of pages on your site that Google has indexed.
If this is the first time you are submitting an XML sitemap to Google, then you may find that a large proportion of the pages are not indexed. The closer the number of “indexed” pages is to “submitted” the better. If there is a large gap between the two numbers, then you may need to investigate why this is the case.
Site Dashboard
Priority: High
Once you have verified your site and submitted an XML sitemap, the next place to navigate to, is the site dashboard, which provides an overview of the status of your site. It will help you quickly identify issues such as crawl errors and any server errors that are preventing Google from accessing your site.
The dashboard also provides information on the number of times your site has appeared in search results and the number of URLs that are indexed in Google.
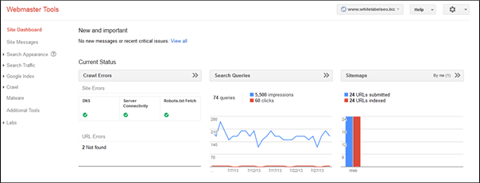
The dashboard also highlights any new and important messages regarding your site, these messages have a high priority and you should pay close attention to any messages that appear here. These messages can include:
- Googlebot can’t access your site
- Increase in soft 404 errors
- Any possible server outages that are taking place
It is important that these problems are fixed as soon as possible. If Google cannot access your site, then potential customers and users cannot access your site.
Note: It is not unusual to see errors and warnings occur on a site, such as crawl errors. It is important however, that you investigate errors on your site and deal with them appropriately.
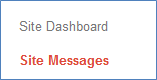
Site Messages
Priority: Medium/High
Site messages can be found in the menu on the left hand side of the screen and can be accessed by clicking on site messages:
The messages section is where you will find alerts from Google about your site. These messages can range from critical to informational messages.
When Google has issues accessing your site or has identified suspicious behaviour on your site, for example your site has been hacked, these messages will appear here. It is important that you pay close attention to the messages that appear in this section.
In some cases no action will need to be taken in other cases it may be critical to fix the issue as quickly as possible.
If you see no messages in this section, then this is a good sign and Google hasn’t identified any current issues with your site.
It’s important that you check any messages that appear in this section, as they contain important updates about your site and any issues that Google may be having accessing your site.
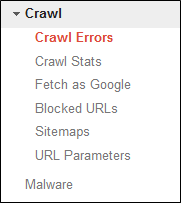
Crawl Errors
Priority: High
It is vital that you check your site for any crawl errors that are being reported by Google on a regular basis. Each error can lead to the loss of a potential customer, as chances are if they land on a 404 page, the customer will not look at other products and bounce off your site. This is especially important for eCommerce sites, where products may be removed from the site, if they are out of stock or no longer being sold on a site (It is recommended that if a product is out of stock, to leave the page on the site, do not delete the page from the site, as this will have a negative impact on your SEO campaign).
Crawl errors have a big impact upon usability and can negatively impact rankings, so it is important that you check and fix these errors appropriately.
To check for crawl errors, go to Crawl > Crawl Errors:
This is split into two sections:
- Site Errors
- URL Errors
The site errors section lists errors that prevent Google from accessing your site and displays errors over the last 90 days. Site owners should pay close attention to any site errors that appear in Webmaster Tools because if Google cannot access your site then potential customers or visitors to your site cannot access your site either.
Crawl Errors
The URLs section displays problems that Google has when trying to crawl specific URLs on a site. This includes:
- 4XX Errors
- 5XX Errors
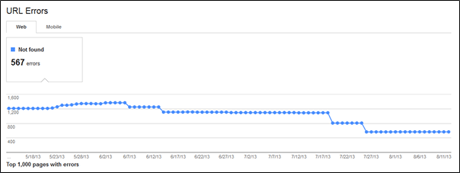
Similar to the site errors, it’s vital that site owners pay close attention to the URL errors that Google finds. In particular, 4XX errors, which are generally 404 errors, which means that a page has either been removed or a URL has been changed, without being redirected to another URL on the site.
It is essential that site owners identify and fix 404 errors that they find on a site. These URLs may have been very important and ranking in search engines as well sending traffic to a site.
If you find 404 errors on a site, you will need to understand what the page of content was originally and where it will need to be redirected to.
Often website owners will remove pages of content that were sending traffic to a site without understanding that by removing these pages, they will lose traffic to their site. Furthermore by removing these pages, the site will also lose any external links pointing to the pages, which will reduce the authority of the site.
In addition if your website visitors have a page of content bookmarked in their favourites and the URL changes without being redirected to another URL, then they will no longer be able to access that page. Some may try to find the page in the new navigation, but most will delete the bookmark and are unlikely to return to your site.
Using the URL Error Tool, website owners can identify 404 errors and put a plan in place to either restore these URLs or redirect them to the most relevant page currently on the site. A 301 redirect is the recommended way to redirect an old URL to another URL on a site. It is recommended to find the most relevant URL to redirect the 404 page.
A major area where 404 errors tend to occur is when website owners decide to get a new site. Often during the design change, URLs will be changed without any thought being given to the existing URLs on the site. This is a recipe for disaster and without a proper migration plan in place; the site will lose rankings and traffic. If this has happened to your site, the URL Errors Tool will help you identify which URLs have changed and where they need to be redirected to.
In the next post in this series on Google Webmaster Tools for eCommerce sites I will cover how to use the HTML improvements section, links to your site, image sitemaps and sitelinks.
Follow my blog for more updates on Google Webmaster Tools and all things technical SEO.